
Adobe Photoshop is a renowned software for photo editing, Here in Leather goods, it is also used for presenting the final product to the buyer after photo shooting. There are different versions of photoshop available in the market. But I will recommend my students to use Adobe Photoshop CC version because here we can directly import the RAW image and edit the RAW image. So no lightroom or other converter is required to convert the raw to jpeg. And there are a lot of good features in Adobe raw editing which is very very helpful for post-processing of the image.
So let’s discuss some essential tools and shortcuts for photoshop which are heavily used for post-processing of the image in leather goods.
Changing the Background of Image:
This is the first step of photo editing because we used to take the photo in studio thereafter we want to present our product in live conditions as per its trend, So we need to isolate the product picture from the background for leather goods.
There are different selection tools available in photoshop but as per our experience, the most convenient in this context is the Polygonal Lasso tool which is useful for drawing straight-edged segments of a selection border. Let’s see the steps of it for changing after opening an image using photoshop.
Step 1: Isolating the image from the background:
- Select the Polygonal Lasso tool (Short cut key L) and select options.
- Specify one of the selection options in the options bar. Selection options A. New B. Add To C. Subtract From D. Intersect With
- Set feathering and anti-aliasing in the options bar. (Optional)
- Click on the image to set the starting point.
- Do one or more of the following:
- At the tome selection (Zoom in CTRL +) (Zoom out CTRL -), (PAN pressing space bar move mouse cursor) Ctrl 0 full-screen image,Ctrl-Shift 0 image size as per pixel.
- To draw a freehand segment, hold down Alt and drag. When you finish, release Alt and the mouse button.
- To erase recently drawn straight segments, press the Delete key.
- Close the selection border:
- Position the Polygonal Lasso tool pointer over the starting point (a closed circle appears next to the pointer), and click.
- If the pointer is not over the starting point, double-click the Polygonal Lasso tool pointer, or Ctrl-click, It will automatically detect the first point.
- (Optional) Click select > save selection, thus you can save the selection.
- (Optional ) Click Refine Edge to further adjust the selection boundary.
- (Optional ) If you want to start selection from the first time then select> deselect (or Ctrl D) (Ctrl Shift D to reselect)
- Define a feathered edge for an existing selection Shift F6 > Enter a value for the Feather Radius, and click OK.
- If your layer is locked, then you can unlock it by clicking the lock button two times or create a new layer using a selection (layer via copy), press Ctrl + J
- (Optional) Then copy the selection by Ctrl C
- (Optional) To create a new layer press Shift Ctrl N.
- (Optional) Paste the selection in the new layer by Ctrl V
- Now you will get a product image with a transparent background.
- Ctrl backspace , change layer color to background color, Alt BackSpace change layer color to foreground color
Step 2: Bring the new background Image
Import background picture by File> Place/place embedded> position the picture by dragging corner> ok, then select the cut object layer and drag it over the new background image layer.
Note: Place/place embedded picture is like a vector image, to rasterize them, click Ctrl+Shift+Alt+N to creates a new empty layer above the selected layer. Then delete the old layer.
Step 3: Fit the isolating Image on the background
Here select product image layer > Click Edit > free transform (Ctrl T), > then drag the corner of the image to fit it > ok. If you want to distort some part to look the image more beautiful, then select the area by rectangular marquee tool (M)> Free transform by CRL T> Right click on selection> select distort> then drag corner point for necessary changes> ok
Step 4: Blur the background a little bit:
Sometimes we need to blur the background of the image to give importance to the product. Here in Photoshop, there are several tools to blur the background. Here mostly we use Gaussian blur. Steps are .. Filter >blur>Gaussian blur>set radius around 10 to the light effect of the blur, set the higher radius to completely faded background >ok
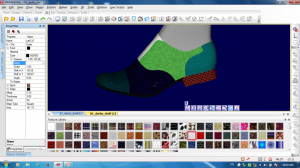
Step 5: Fine-tuning of the product image
Here we can change the brightness contrast of the image. It can be done by Adobe raw editing or by modifying Create a new fill or adjustment layer in the layer panel. There are huge options, mostly we use curve and brightness contrast section.
Sometimes we modify the image by brush. Or by pressing E we can erase some portions of the image. In this case, the size and intensity of the brush can be modified in the following way: Alt + Right Mouse -drag left / right to decrease/ increase brush size and up/ down decrease/ increase brush hardness.
Sometimes we complete the laters by press Ctrl + G, [to ungroup those press Shift + Ctrl + G]. To merge all layers, all visible layers, press Shift + Ctrl + E.
Step 6: Save the Image:
Now we need to save the image, in this case, save/export the picture as jpeg format with default compression. For posting it through social network use sRGB instead of Adobe RGB in the time of export.
Other selection processes
Selection by Pen Tool(P): It is mainly used for curve selection for photoshop and Corel draw. The output image after the selection of the pen tool is a vector image.
- From the Pen tools group, select the Curvature Pen tool or press P in Keyboard.
- To create the first anchor point, click or tap anywhere in the document.
- (Curved path) Using a mouse or on a touch device, drag the pointer to draw the next segment of your path. While the mouse button is pressed down, optimize the curve of the segment. The previous segment is automatically adjusted to keep the curve smooth. Optimize the curve of the segment while the mouse button is pressed down.
- (Curved path) Press ALT and last point to delete the curve direction.
- To convert a smooth anchor point to a corner point, or vice versa, double-click the point.
- To delete an anchor point, click it and then press the Delete key. While the anchor point is deleted, the curve is retained and suitably adjusted in relation to the remaining anchor points.
- Draw additional segments and complete the path.
- When you’re done a drawing, press the Esc key.
- You can covert the bounded area to the selection area by right click> make selection>choose feather radius> ok
Quick selection tool(W): In some cases, if there is a difference in contrast between product and background, In that case, we use the Quick Selection Tool (W) to select the product image by painting.
Some settings of quick selection tools are given below…
- New Selection: The default option enables you to create a new selection. There are also options to add to and subtract from your selection.
- Brush Picker: Choose your desired brush settings. Specify the diameter, from 1 to 2500 pixels. You can also specify hardness, spacing, angle, and roundness settings.
- Sample All Layers: If your image has layers and you want to make a selection from all the layers, select this option. If you leave it deselected, you will select only from the current layer.
- Auto-Enhance: Select this option to have Elements automatically refine your selection by implementing an algorithm.
Steps :
- Drag, or paint, the desired areas of your image. Your selection grows as you drag. If you stop dragging and click in another portion of your image, your selection includes that clicked area. Paint a selection with the Quick Selection tool.
- Add to or delete from your selection, as desired:
- To add to your selection: Press the Shift key while dragging across your desired image areas.
- To delete from your selection: Press the Alt key while dragging across your unwanted image areas. You can also select the Add to Selection and Subtract from Selection options on the Options bar.
- If you need to fine-tune your selection, click the Refine Edge option on the Options bar and then change the settings, as desired. Note that if your object is fairly detailed, you may need to use the Lasso or another selection tool to make some final cleanups.
- Brush size short cut: Alt + Right Mouse -drag left right to decrease/ increase brush size and up/down decrease/ increase brush hardness
- Rotate Your Image – Hit the letter “R” on your keyboard, then click and drag your mouse.
Reference: Photoshop CC tutorials – Adobe Help Center
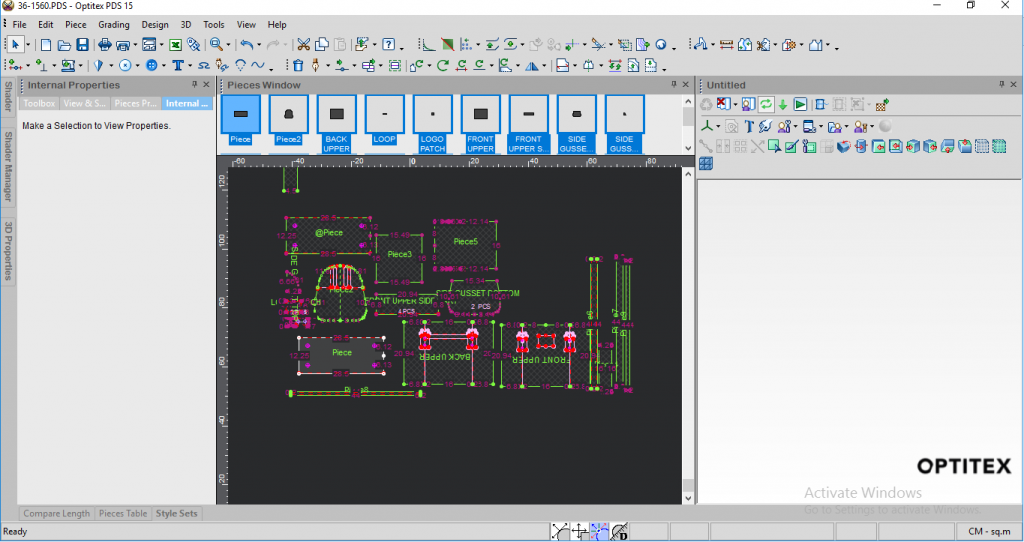
For knowing the basic knowledge of bag designing in Optitex, click here
Please share your feedback and suggestions. In case if you have any queries about any topic of Footwear and Leather Goods, post it in the comment section. And if you like this topic you may share it on facebook, twitter or any social site. Thank you